Single-wall rendering
Wall Rendering Sheffield: Re-rendering a Single Elevation
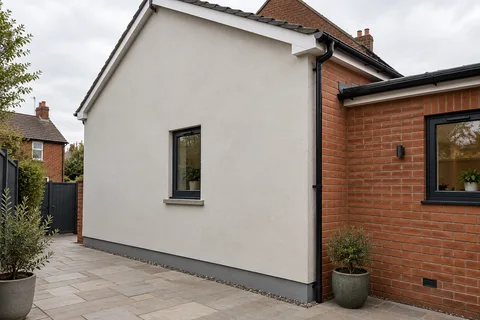
Often only one wall of a house has failed. It is usually the one that takes the weather: a tall gable, a side elevation facing west, or a rear wall that never dries. Re-rendering that one face, and leaving the sound walls alone, is a complete job in its own right. Its success depends on two things: building the new render properly on that wall, and finishing it neatly where it meets render, brick or stone that is staying.

On this page
Is one wall the right size of job?
The test is whether the trouble really stops at that wall. If the gable is cracked and drummy but the front and rear sound solid when tapped, a single-wall job is sensible. If the same hollow note turns up on the other faces, you are looking at the start of a whole-house problem, and the house rendering page explains when that is the better route.
Check the cause before the wall is stripped. A gutter overflowing down one face, a leaking downpipe joint or a sill with no drip can wreck one area of render while the rest is fine. Fixing the water source is part of the job; re-rendering under a dripping gutter only starts the clock again.
Single-wall jobs also include walls that have never been rendered: a new blockwork extension, a rebuilt gable or a garden wall. Those start from bare masonry, so the work is the same build-up without the stripping.
- Set the edges Decide where new render stops against brick, stone or an existing finish.
- Prepare the background Remove loose material, repair masonry and prepare suction and surface key. Existing paint needs a specified removal or alternative treatment.
- Base coat Built up to level the wall, with mesh where backgrounds change or crack.
- Finish Matched to the rest of the house or chosen as a deliberate contrast.
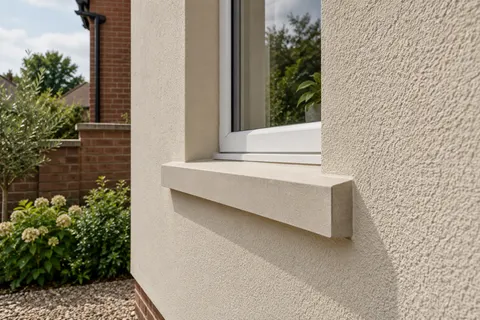
- Shed the water Copings, sills and the base bead keep rain off the top and away from the bottom edge.
The usual order of work. The survey and the chosen products decide the actual steps.
Taking one wall back and building it up again
The old render is hacked off the whole face, down to masonry, and the cut is stopped on a clean line at each corner. That line matters: the render on the return wall has to be sound right up to it, so the corner is tapped and, if the old coat is loose there, cut back a little further round the return to a firm edge. Brick or stone exposed by the stripping is repaired and loose joints raked and filled.
Beads go on before any render. At the base, a bellcast bead sits at damp-proof course level so the render finishes above it with a drip edge; Catnic's data sheet for its PVCu bead lists it for render 10-16 mm thick, fixed at no more than 600 mm centres. This wall's outside corners get angle beads, and a straight stop bead marks every place the new coat finishes against something that stays. Next comes the levelling coat, with mesh pressed into it, and then the finish.
The finish on one face is applied in one go. K Rend's Silicone TC data sheet tells applicators to complete a continuous surface without interruption, keeping a wet edge, so a gable is finished from top to bottom in one session, not over several days.
Protect the ground, windows and neighbouring surfaces; take off fittings and downpipes.
Hack the old render off the whole face, cutting a clean line at each corner.
Check the render on the returns is sound at the cut; repair the exposed masonry.
Fit the beads: bellcast on the DPC line, angles on the corners, stops at the join.
Apply the base coat with mesh, then the finish across the whole wall in one session.
Refit fittings and downpipes; clear the base of the wall of soil or paving.
Meeting the walls that stay
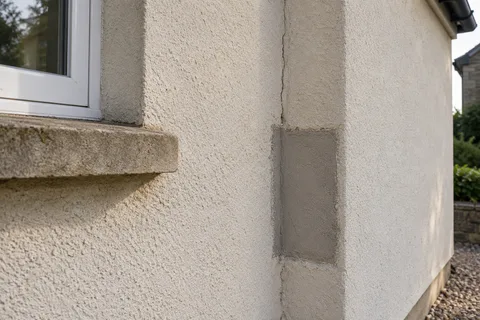
A corner is the best place for new render to meet old. The change of plane hides small differences in colour and texture, and an angle or stop bead gives a crisp edge. A join in the middle of a wall is much harder to hide, so if the failed area stops partway along a face, it is often neater to take the whole face back to the corner.
New render will not look identical to a weathered wall, even in the same colour. Fresh silicone, monocouche or paint usually reads slightly brighter for a while. You can accept that, choose a deliberate contrast for the re-rendered face, or plan a coating over the neighbouring walls once the new render has cured; the respray page covers that last option.
Rules that still apply to one wall
Building Regulations guidance can apply even here. Approved Document L classes new external render as renovation, and its Diagram 11.1 measures a stripped and re-rendered wall against the whole elevation it belongs to. So if you re-render over half of one face, building control may look for insulation on it, provided that is practical and passes the guidance's cost test. An isolated small repair may fall below that test, but repairs need to be considered together with any wider renovation. Renovation affecting more than a quarter of the external building envelope is the other upgrade trigger. Ask building control before you fix the specification.
Planning rules differ by place. Inside a conservation area, or the National Park around High and Low Bradfield, householder permitted development does not extend to covering any part of a house in render. That matters most when a bare stone or brick wall is to be rendered for the first time. Garden and boundary walls have their own Sheffield rules: the council notes that demolishing walls in a conservation area may need permission.
Common questions
Can I re-render one wall and leave the rest?
Yes, if the other walls are sound. The new render should stop at corners with beads, and the render on the returns needs to be firm right up to the cut.
Will the new wall match the old ones?
Close, not identical. Weathered render looks different from fresh render in the same colour, so expect a difference at first or plan a coating over the neighbouring walls.
See housing and planning information for Sheffield and nearby places, including the source and geography behind each figure.