Re-rendering Just One Wall of a Sheffield House
Re-rendering Just One Wall of a Sheffield House
Re-rendering a single elevation makes sense when one face of a house has failed and the others have not: a rear wall that takes the weather, a side wall above a drive, or an extension built later than the house. The work follows the same physical sequence as any re-render. What is different is the edge, because the new render has to stop somewhere and meet older material cleanly.

On this page
What happens to the wall, from strip to finish
Work normally starts with a small trial removal rather than a full strip. SPAB's guidance for old walls is to test-remove a small area first and to take render off with hammer and chisel, carefully, because levering large sheets away can tear the face off softer brick or stone. On a single elevation the trial is usually placed where the render already sounds hollow or has cracked, because that is where the old coats have already let go.
Once the wall is bare, the backing is repaired. Loose bricks or stones are reset, open joints are raked out and filled, and holes from old fixings are made good. Deep hollows are built out with a dubbing-out coat so the first full coat can go on at an even thickness; K Rend's product guide describes its UF Base as suitable for this. If the old render had trapped water, SPAB's advice is to let a saturated wall dry before rendering it again, so on a small job the drying time can matter more than the area.
The new coats depend on the system chosen. A base coat goes on first, with alkali-resistant glass-fibre mesh bedded in at reveals and other stress points; K Rend's HP14 data sheet gives a nominal 4-6 mm for that coat on blockwork, masonry or stone. A thin-coat finish follows: K Rend's Silicone TC goes over a primer left to dry for 24 hours, on base coats at least 14 days old, and is laid on to the thickness of its largest grain. A one-coat monocouche such as K Mono works differently, going on in a single pass of about 17-18 mm and being scraped back to a nominal 16 mm.
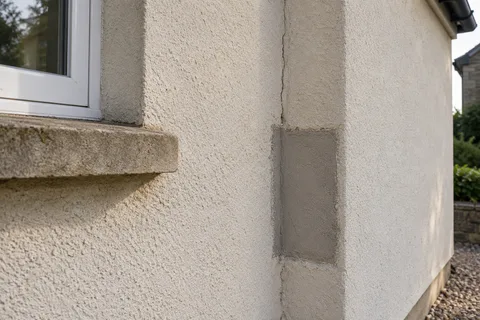
None of that changes because only one face is involved. What changes is the boundary. House rendering across every elevation can carry the finish round each corner without a break, whereas a single-elevation job needs a planned edge at both sides, at the base and under the eaves, and those edges are where the extra care goes.

| Stage | What happens to the wall |
|---|---|
| Trial removal | A small area is cut away to show the backing and the bond of the old coats |
| Strip | Old render comes off with hammer and chisel back to sound masonry |
| Repair and dub out | Masonry is repaired and hollows are built out to an even plane |
| Base coat | Applied over the face with mesh at reveals and other stress points |
| Finish | A thin coat over primer, or a one-pass monocouche scraped to texture |
| Edges | Beads at the base, corners and openings; a clean junction with retained render |
Where the new render stops
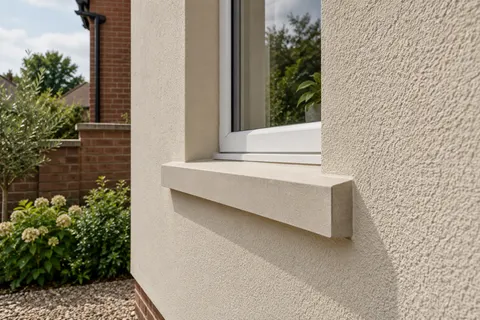
The neatest stopping point is a corner. Two faces of a house are seldom seen in the same light at the same moment, so a small difference in colour or texture between a new rear wall and an older side wall is far less obvious than a join in the middle of a face. A stop bead or angle bead fixed at the corner gives the new render a straight, protected edge to finish against.
Where the retained wall on the return is also rendered, its edge is cut back to firm, bonded material and the new work is finished against it. If the old render near the corner turns out to be hollow, the cut has to move back until it reaches sound render, because hollow areas do not stop neatly at corners. Allow for the line on the return to shift once the strip begins, and agree beforehand how far it may go.
Some walls do not have a clean corner to stop at. A rear elevation might wrap round a bay or meet a kitchen extension part-way along. Then the stopping point is a feature that already breaks the surface, such as a downpipe line or the edge of an opening, rather than an arbitrary line drawn on a photograph.
Fittings on the face come off and go back on: downpipes, cables, outside lights and alarm boxes. Downpipes are refixed after the finish, on new brackets if the old ones have rusted, and scattered cable runs are worth gathering into one tidy route while the wall is bare.
Building regulations and planning for one elevation
Approved Document L treats rendering the outside of a wall as a renovation of that wall. Where more than half of an individual element is renovated, the guidance is that the whole element should be brought up to the wall U-value in Table 4.3, 0.30 W/m2K, unless that is not technically, functionally or economically feasible, the economic test being a simple payback within 15 years. Diagram 11.1 adds the detail that matters here: when render is removed from the outside, the element is the whole elevation in which that wall sits.
That gives a rough dividing line between a repair and a re-render. For example, on a hypothetical gable where a hollow patch covers about a third of the face, cutting out and re-rendering the patch stays under half the elevation. Stripping the whole gable goes over it, so building control may expect the wall to be insulated where that is feasible, which is when external wall insulation becomes part of the conversation. The same document allows listed, conservation-area and traditional stone or lime-rendered walls to be treated differently where upgrading would harm their character or cause long-term deterioration.
Planning is a separate question. Under the householder permitted development rules, cladding any part of the outside of a house with render is not permitted development on protected land such as a conservation area or National Park. If your wall is bare stone or brick and the house is in one of Sheffield's conservation areas, ask the council before rendering it. For the conservation areas at High and Low Bradfield, Upper Midhope and Langsett, the planning authority is the Peak District National Park Authority rather than the city council.
Living with one new wall beside older ones
A new elevation will look cleaner than the walls beside it for a while. Fresh render has none of the weathering film that builds up on older render from dirt, spores and traffic, which K Rend's maintenance guidance describes as natural. If the contrast matters to you, the options are to accept it and let it soften, to coat the older walls in a matching colour, which is the subject of the respray guide, or to include more of the house in the job.
Keep a note of what went onto the wall: the base coat, the finish, the colour reference and the date. A later patch or a new window goes far better when the next person knows what is there. For aftercare, K Rend's guidance for its renders is a gentle clean after a few years with a pressure washer on a fan setting rather than full power, working from the top down.
If more than one face is starting to fail, it can make sense to put scaffold up once and treat them together, with the edges planned around the house rather than one wall at a time. The Sheffield wall-rendering guides cover repairs, finishes and single-elevation work separately, so you can match the scope to what each wall actually needs.
Common questions
Will the new wall match the rest of the house?
Not exactly, at least at first. Fresh render is cleaner than render that has weathered for years, and a different product or texture catches the light differently even in the same nominal colour. Stopping at a corner helps because the two faces are seen separately. If the rest of the house is painted, the new wall can be painted the same colour once its coats are ready to take paint. If the finish is through-coloured, a sample panel on the new wall, viewed beside the old one from where the house is normally seen, is the most reliable check.
See housing and planning information for Sheffield and nearby places, including the source and geography behind each figure.