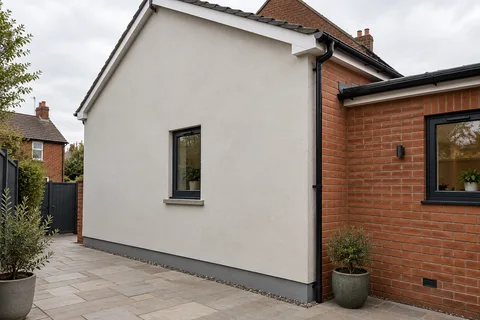
Silicone, one wall
Silicone Render for a Single Wall in Sheffield
Silicone render is a coloured resin paste, trowelled on thinly over a levelling coat of polymer render. On one wall, it is most often used on a new extension, a re-rendered gable or a side elevation that has been stripped. The finish itself is the easy part. The harder parts are getting the wall flat enough for a coat only a couple of millimetres thick, and finishing it where it meets the existing render, brick or stone beside it.

On this page
The build-up on one wall
In K Rend's version, Silicone TC, the binder is a blend of silicone and acrylic resins, and the tub comes ready to use with a biocide already mixed in. The coat is no deeper than the biggest particles in it, which K Rend sizes at 1.5 mm (TC15) or 3 mm (TC30), so it will not hide a dip or a bump. The levelling is done by a base coat; K Rend's HP14 base is nominally 4-6 mm with alkali-resistant mesh bedded into it. Before the finish, the levelled wall gets a tinted primer that needs a day to dry, and K Rend wants any render base underneath to have had a fortnight to cure first.
If the old render on the wall is sound, flat and clean, the system can sometimes go over it. If it is hollow, cracked or bulging, it comes off first, because a thin finish will copy every flaw underneath.
Strip or check the existing render; repair the masonry on that wall.
Fit the beads: bellcast just above the DPC, angles on the corners of this wall, stops where it meets the neighbouring finish.
Apply the base coat with mesh, adding extra at window and door corners.
Wait for the base coat to cure, then prime and allow the primer to dry.
Lay on the silicone and work the texture with a plastic float, finishing the wall in one go.
Refit fittings and downpipes once the finish has hardened.
- Sound background A background accepted by the specified system. Keeping old render requires a system-specific assessment of its bond and condition.
- Beads Corner, stop and base beads set the edges and straight lines.
- Basecoat with mesh Glass-fibre mesh embedded in the basecoat resists cracking.
- Primer Where the system requires it, tinted towards the finish colour.
- Silicone finish A thin, through-coloured, water-repellent coat that forms the texture.
Wall on the left, finish on the right. Not to scale: coats, thicknesses and primers follow the chosen manufacturer’s system and the condition of the wall.
Working the wall in one pass
A silicone finish shows its joins. K Rend's instruction is to keep going across an unbroken surface until it is done, never letting the leading edge dry, so a wall is started and finished on the same day. On a tall gable that means enough scaffold lifts and enough people working at once; a small team on a ladder cannot keep the edge wet across a big wall.
Its weather rules are a minimum of 5C for both air and substrate, no work in strong sunshine or wind or onto a wet or frozen wall, and protection for the fresh coat against rain and fast drying. A single exposed gable in Sheffield can be the hardest wall on the house to get a good day for.
Meeting the existing finish
The wall next door is rarely silicone. On many houses the adjoining walls are painted sand-and-cement, monocouche or pebbledash, and the rubbed grain of a silicone finish looks different from all of them, even in a similar colour. Silicone cannot be feathered into an old render, so it ends at a bead. The neatest place for that is an external corner, where the change of texture reads as a deliberate edge.
If the new wall should blend in, pick the nearest shade to the old render as it looks now, weathered, and have a trial patch made up to hold against the old wall; K Rend recommends one. If you want everything to match, the adjoining walls can be coated later; see recolouring a wall.
Small areas and repairs
Small jobs still need the full build-up. Rendering the reveals around one new window, or the panel under a new sill, in silicone means base coat, mesh, primer and finish, with mesh patches at the corners of the opening where cracks start. A damaged area of an existing silicone wall is repaired with the same build-up, ideally the same product and grain, and finished to a bead or a natural break so the edge of the repair is not left in open wall.
Silicone sheds water well, but a wall in shade or near trees still grows algae in time. For cleaning, K Rend suggests a pressure washer on a fan setting rather than full power, with mild detergent, and a biocide for green growth.
Common questions
Can silicone render be used on just one wall?
Yes. It is common on extensions and re-rendered gables. It needs a sound, flat base coat, and it should end at a bead, ideally at a corner, where it meets the existing finish.
Will silicone match the render on the rest of my house?
Usually not exactly. Its texture differs from painted, scraped or dashed render. Choose a close colour and put the join at a corner, or plan to coat the other walls.
See housing and planning information for Sheffield and nearby places, including the source and geography behind each figure.