Render Around a Replaced Window: Reveals, Sills and Beads
Render Around a Replaced Window: Reveals, Sills and Beads
Taking out an old window nearly always damages the render around it. The frame is cut or levered out, the render on the reveals comes away with it, and the new frame may sit at a slightly different depth. What follows is a small but fiddly piece of rendering: rebuilding the reveals, the head and the area under the sill so that the opening sheds water and looks square.

On this page
What sits around the frame
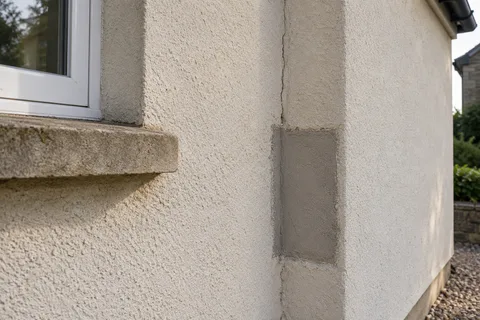
The reveal is the short return of wall between the face of the house and the window frame. On a rendered wall it is rendered too, normally with a crisp outer corner formed over an angle bead or worked by hand. When the old frame comes out, the render on the reveal often cracks back to that corner, and sometimes past it onto the main face.
Reveals are a stress point. K Rend's product guide calls for alkali-resistant glass-fibre mesh at door and window reveals to reduce the stress that leads to cracking there, and its maintenance guidance names openings as the usual place for stress cracks. Leaving the mesh out of a rebuilt reveal removes protection that the original system was designed to have.
If the house has external wall insulation, the reveal is more than render. Beneath the thin finish there are insulation boards, often returned into the reveal, a meshed base coat and the finish itself. K Rend's HP14, for example, is a base coat designed for insulation board substrates. Replacing a window on an insulated wall can disturb all of those layers, so the repair has to rebuild the system rather than patch the top coat.
On an ordinary solid or cavity wall with sand-and-cement or polymer render, the job is a render repair in each reveal and around the frame: cut back to sound render, rebuild the coats, finish to match. The rest of this guide follows that case.

Cut the damaged reveal render back to a sound, bonded edge.
Check the new frame position and the depth of each reveal.
Dub out deep areas and fix beads to the outer corners.
Apply the base coat with mesh lapped onto the main face.
Lay the finish and texture it to match the wall.
Seal the frame junction once the render has dried.
Rebuilding the reveals
The damaged render is cut back to a clean line where it is still firmly bonded, which can mean taking a strip off the main face as well as the reveal. Loose mortar and debris are cleared from around the new frame so the fresh render bonds to masonry, not to dust or packers.
The new frame position sets the depth of each reveal. If the replacement sits further back than the old window, every reveal gets deeper and needs more build-up; if it sits further forward, the reveals become shallower and the render may finish thinner against the frame. Deep gaps are built out first with a dubbing-out coat, such as K Rend's UF Base, rather than filled in one heavy layer.
A bead is fixed to the outer corner of each reveal to give a straight, protected arris. The base coat follows, with mesh bedded across that corner and lapped onto the main face so the stress around the opening is spread over a wider area. The finish then goes on and is textured to match the surrounding wall, and the render is kept neat against the frame so the installer's sealant has a clean, dry surface to grip.
At the head of the opening, a bellcast bead can form a small drip so that water running down the wall above is thrown clear of the frame. Catnic's datasheet for its bellcast bead describes it as used above or below doors and windows, as well as at DPC level, to let rainwater drain clear of the underlying wall.
The sill and the wall beneath it
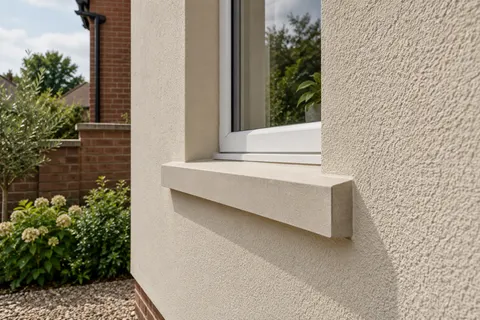
Below the window, the sill does the heavy lifting. It needs to slope outwards and project far enough past the render for its drip to throw water clear. Ibstock’s January 2025 note on NHBC cast-stone details specifies a drip at least 40 mm beyond the rendered face for the NHBC-registered new homes covered by that standard. It is not a blanket rule for replacement windows. Measure the proposed sill from the finished render face, and agree the projection, end details and seal with the window installer before ordering.
The ends of the sill matter as much as its front edge. Water runs off the ends and down the render below, leaving the grey streaks so often seen under windows. The same summary notes that extending sills beyond the reveals helps to reduce water staining on rendered walls, whereas a replacement sill cut flush with the reveal drops its water straight onto the face.
If the new sill is shallower than the old one, the strip of render below where the old sill was bedded will need making good. It is treated like any other patch: cut to a sound edge, coats rebuilt to the same thickness and the texture matched to the wall around it.
Finishing so the repair does not frame the window
A rebuilt reveal can stand out as a bright frame round a window on a weathered wall. On a painted render, the usual answer is to repaint the whole elevation, or at least to a natural break such as a corner, once the repair is ready to coat. On a through-coloured render, a small test area viewed from where the window is normally seen is the honest check before the full finish goes on.
Timing matters. Cement-based coats need time before a thin-coat finish goes over them; K Rend's Silicone TC data sheet, for example, asks for base coats at least 14 days old and a primer left to dry for 24 hours. If a window is replaced late in the year, the repair may have to sit at base-coat stage until the weather allows the finish, since the same data sheet sets a minimum of 5C for both the air and the wall.
If several windows are being replaced over a few years, each opening repaired separately will look slightly different. Doing them in one visit, or planning a coat of colour over the whole elevation at the end, avoids a wall with a different-looking ring round every window. The wall rendering guides on this site cover the coating and repair options in more detail.
Common questions
Who repairs the render, the window fitter or a renderer?
That depends on what was agreed. Some window installations include basic making good, which usually means filling round the frame and patching the reveals. Rebuilding reveals with beads and mesh, forming a drip at the head or matching a textured finish is rendering work. Ask the window installer what their making good covers, and if the new frame sits at a different depth or the sill has changed, let whoever does the render see the opening before the finish is chosen.
See housing and planning information for Sheffield and nearby places, including the source and geography behind each figure.